Can it be done? My answer is yes. Should it be done? Also yes!
I teach a 3 hour blocking class and I am pretty evangelical about blocking. Blocking is the closest thing to magic I’ve found in the world of knitting (unless you count actual spinning – because fluff into yarn is pretty amazing). It is a very rare project that I would say “eh, you don’t need to block that”. I mean, it happens but not often.
Which brings us to acrylic content yarn. Acrylic is plastic. You can get it as wet as you want and there will be no penetration of the fibers. Wet blocking can clean acrylic projects but it doesn’t really do any actual blocking. And when you have blends with acrylic it really fights with you about the blocking. It inhibits the process. But I have read a bit about heat blocking acrylic and it fascinates me.
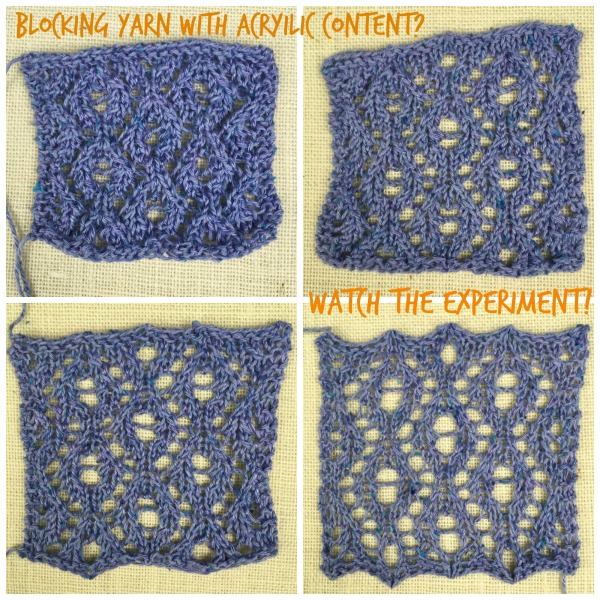
I received a fun blend of cotton and acrylic from Kraemer Yarns called Tatamy Tweed DK and I decided to go a wee bit mad scientist on it. It is 45% Cotton and 55% Acrylic, which makes it machine washable and that is a major plus for many projects. I knit four swatches and messed about with them a bit.
The first swatch is the “control” (proper sciencing here). I knit it and took it off the needles. Bing, bang, boom.

Kraemer Tatamy Tweed DK Unblocked
The second swatch I blocked using a hot steam iron (no actual physical contact – that would be melty) to see if it would work and it did. But could I leave well enough alone? Nooooooo. I had my husband throw it in the washing machine and then into the dryer. I was not nice to this swatch. It received no special treatment. I think the dryer was on permanent press.
Kraemer Tatamy Tweed DK, Heat/Steam blocked & Washed
It shrank a bit but overall it did hold out some of the lace and looks pretty good. As long as you take into account the shrinkage I think this is a viable care technique. You would probably get less shrinkage if you were more careful with the temp of the drying.
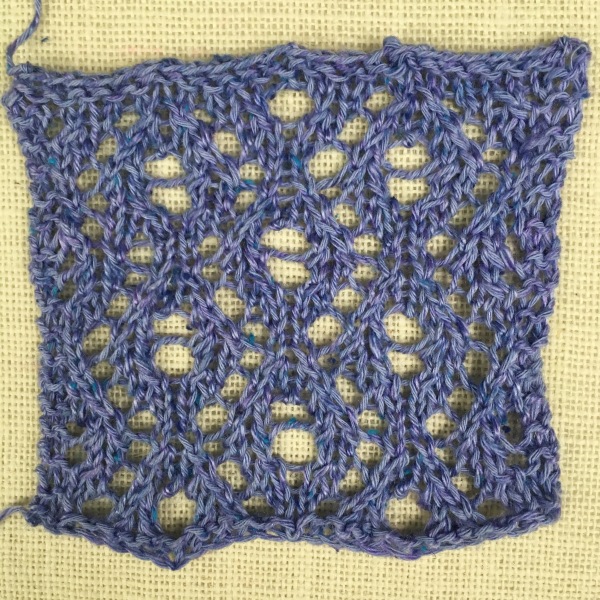
Kraemer Tatamy Tweed DK, Wet Blocked
For the third swatch I used wet blocking. The yarn bloomed a good bit and drew back some after unpinning. I speculate that this is the acrylic content having a bit of an argument with the cotton about where it wants to be. But it looks nice. I am guessing it will have to be reblocked after each hand washing.
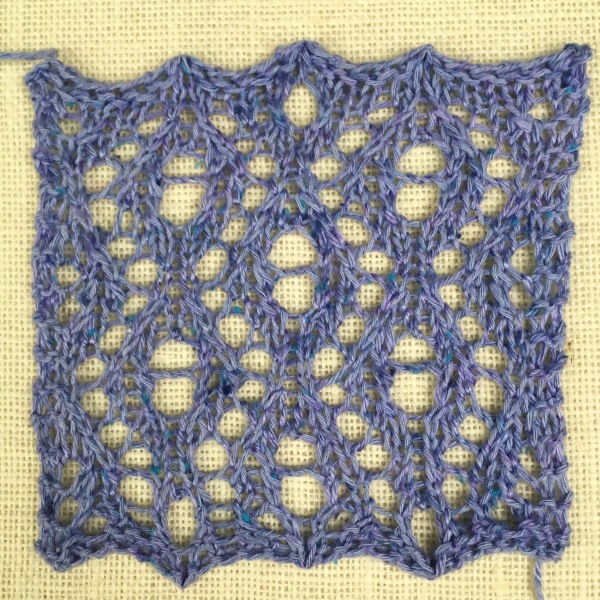
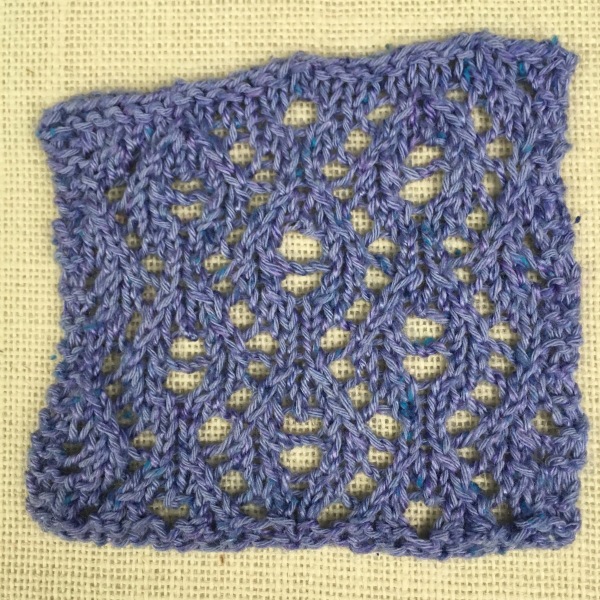
Kraemer Tatamy Tweed, Heat/Steam Blocked
And finally I steam blocked the fourth swatch on camera so that y’all could see how heat/steam blocking works! In short, you pin the knitting out to the final size you want and then use a steam iron to heat set the stitches. You hold the iron about a half of an inch above the surface of the yarn and allow the heat and steam to permeate the fibers. Move slowly and make sure the yarn heats up. When I unpinned it there was no movement and the lace stayed crisp and clear.
So there you have it. You can indeed block yarn with acrylic content. In fact there are several options. To see the heat/steam blocking in action and hear further analysis of my experiment check out the video on Watch Barbara Knit.
I called this Swatch Lab and hopefully it will be the first of many of this style of video. Please let me know in the comments if you like this idea and if you have any suggestions for future yarn experiments.